Start With the Service Window, Not the Equipment List
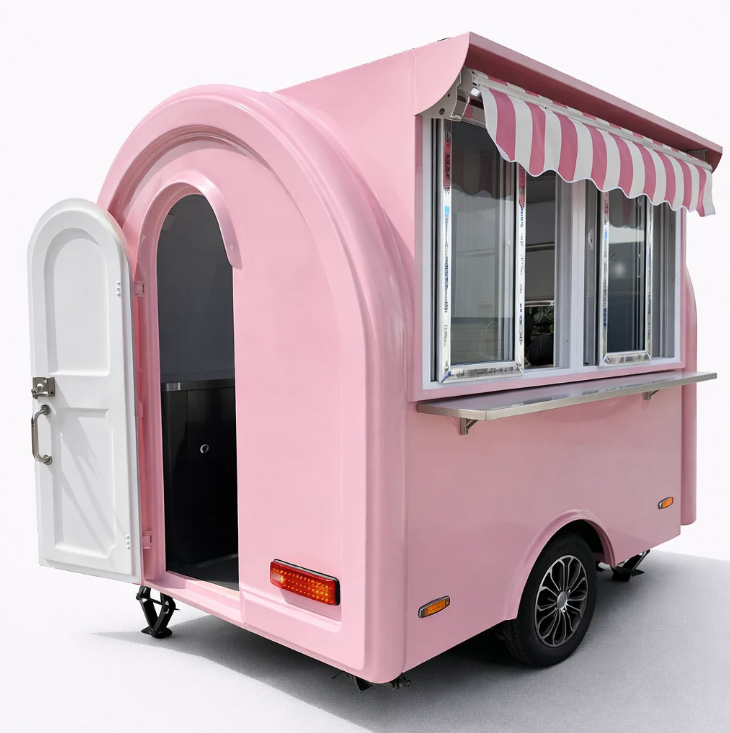
A food concession trailer lives or dies by the order in which people, food, and waste move inside it. Before picking a fryer or a prep table, sketch the service window, the customer queue, and the employee entry. The window sets the first handoff point, and every downstream choice should support a clean flow from storage to prep to cooking to pickup. A common mistake is filling the shell with equipment first, then squeezing aisles into whatever space remains. That approach usually produces a trailer that looks efficient on paper but forces awkward reaches during a lunch rush. The better sequence is to place the customer-facing side, mark the cook line, reserve a clear landing zone for plated food, and only then select cabinet dimensions. In a 12-foot unit, even 6 inches of misplaced depth can turn a two-person rhythm into a constant side-step. The goal is not maximum equipment count. It is a repeatable path that holds up when tickets stack up.
Map Hot, Cold, and Dirty Paths Before Drawing Cabinets
Food safety starts with separation, not signage. The FDA Food Code 2022 emphasizes keeping raw animal foods away from ready-to-eat items and preventing cross-contamination through equipment and work surfaces. In a small trailer, that principle translates into three visible paths: hot cooking, cold holding and prep, and dirty dish or waste removal. These paths can touch at controlled handoff points, but they should not crisscross in the middle of the cook line. NSF/ANSI 2 also gives designers a useful baseline for cleanable food-contact surfaces and sanitary installation, which matters when cabinets are packed tight. During a retrofit for a barbecue trailer in a humid Gulf Coast market, the build team found that a 24-inch prep shelf had been placed directly beside the fryer. Cooks had to turn 180 degrees with raw product in hand, then reach over a hot surface to reach the cold rail. Moving the shelf to the service side and adding a small landing area cut the turn, kept raw and cooked zones apart, and made the window handoff cleaner. The fix was not expensive. It was a layout correction that came from tracing actual footsteps rather than staring at a catalog.
Give the Cook Line a Realistic Clear Width
Clear width is where optimistic layouts fail. A drawing can show a 24-inch aisle, but a person carrying a 12-inch pan and turning toward a hood does not move like a line on paper. Field experience points to a practical range of 30 to 36 inches for main work aisles, with 36 inches or more where two people pass or where a door swings into the path. Local health and fire requirements can push those numbers higher, so the final check belongs with the authority having jurisdiction. The table below shows a working set of planning targets, not a substitute for code review.
| Work zone | Practical clear width | Main constraint | Common layout mistake |
|---|---|---|---|
| Service window landing | 30 to 36 in | Tray pickup and cash handoff | Stacking condiments in the landing zone |
| Cook line aisle | 36 to 42 in | Hot surface reach and two-person traffic | Placing the fryer at the only passing point |
| Prep aisle | 30 to 36 in | Refrigerator door swing and cutting board reach | Using a 24 in aisle after equipment is installed |
| Warewashing and waste | 30 to 36 in | Soil removal and clean storage separation | Routing dirty bus tubs through the pickup zone |
| Rear entry and utility | 36 in or more | Cylinder, water, and electrical access | Blocking service access with dry storage |
A narrow aisle is not automatically wrong. In a one-person breakfast trailer with a fixed menu, a 30-inch prep aisle can work if the cook never needs to pass another worker. The limitation is flexibility. Once the menu adds a second cook or a larger packaging step, that same aisle becomes a bottleneck. The practical answer is to measure the worst realistic move, not the average move.
Build Storage Around Daily Volume, Not Peak Inventory
Storage planning often starts with a big number: how much can fit. A better starting point is daily sales volume, par levels, and delivery frequency. Dry storage should hold the next service plus a small buffer, not a week of backup that blocks access to the water heater. Refrigeration needs enough room for cold holding and prep, with a clear zone for raw and ready-to-eat items. Overhead cabinets can add useful capacity, but they should not force a tall cook to duck under a shelf or block the hood's air path. In practice, a trailer with 18 inches of clear counter landing space and well-planned vertical storage often outperforms a unit with more cabinets and no place to set a tray. The tradeoff is honest: more storage can reduce restock trips, but it also adds weight, cleaning surface, and visual clutter. The right balance depends on the menu, delivery schedule, and how long the trailer stays at one spot.
Use Vertical Space Without Blocking Ventilation and Service Access
Vertical storage is valuable in a compact trailer, but it has hard limits. NFPA 96 addresses ventilation control and clearance for commercial cooking operations, and a layout that packs shelves against a hood or blocks access panels can create problems that are expensive to fix later. The same logic applies to electrical panels, water heaters, and gas cylinders. A useful rule is to keep a dedicated service corridor to every component that needs inspection or reset. Shelving above the cook line should be shallow enough to avoid head strikes and positioned so that hood filters can be removed without moving a case of oil. In one layout review, a trailer design had used the space above the three-compartment sink for dry goods. The shelves looked efficient until the drain valve and water connections needed attention. The redesign moved dry goods to a lockable cabinet near the entry and left the sink wall clear. The storage loss was small. The maintenance access gain was substantial.
Validate the Layout With a Mock Service and a Maintenance Walk
A layout that works on a screen still needs a physical test. Tape the equipment footprints on the floor, mark the service window, and run a mock service with the actual trays, bags, and pans. A 15-minute lunch rush simulation will expose reach problems that a static drawing hides. Then do a separate maintenance walk: open every access panel, pull the hood filters, change a gas cylinder, and trace the path for a mop bucket. If any step requires moving a prep table or climbing over a cooler, the layout needs another pass. It also helps to check local code early, because health departments and fire authorities may interpret aisle and separation requirements differently. No single layout fits every menu, climate, or staffing model. A seafood trailer in a coastal market has different waste and ventilation demands than a coffee trailer in a downtown lot. The practical work is to match the layout to the real service pattern, then leave a little room for the menu to evolve. For operators comparing build partners, Mingtai's large production facility and broad model catalogue give a useful reference point for customization and supply chain support, while the final layout still needs to be tested against the actual menu and local code.
Table of Contents
- Start With the Service Window, Not the Equipment List
- Map Hot, Cold, and Dirty Paths Before Drawing Cabinets
- Give the Cook Line a Realistic Clear Width
- Build Storage Around Daily Volume, Not Peak Inventory
- Use Vertical Space Without Blocking Ventilation and Service Access
- Validate the Layout With a Mock Service and a Maintenance Walk